DOWNLOADABLE: Free Fax Cover Sheet Template
- FAXAGE Blog Home
- Fax Retention Policies: How Long Should Businesses Keep Faxes?
- DOWNLOADABLE: Free Fax Cover Sheet Template
- The Evolution of Faxing: Then & Now
- How to Use Fax Logs & Audit Trails for Better Reporting
- HIPAA Compliant Fax Cover Sheet
- UPDATED: Top Features to Look for in an Online Fax Service in 2026
- How to Tell if a Fax Went Through
- How to Send a Fax from iPhone Without an App
- How Long Does Faxing Take?
- Where Can You Go to Fax Something?
- API-Based Faxing: What Developers Should Know About Fax Integration
- How to Choose the Right Online Fax Plan for Your Business Size
- 10 Medical Professionals Discuss Online Faxing
- 10 Legal Experts Weigh In on Online Faxing
- Why Online Faxing is Imperative in the Legal Field
- Are Free Online Fax Services Safe?
- Are Online Fax Services Secure?
- FAXAGE Earns HITRUST Recertification
- Enhancing Year-End Tax Preparations with Online Faxing
- How to Transition Your Business from Traditional Faxing to Online Faxing: A Step-by-Step Guide
- Introducing FAXAGE System Status Monitoring
- Cost-Saving Strategies: How Online Faxing Reduces Overhead Expenses
- 50 Experts Weigh In: Entrepreneurs on HIPAA-Compliant Faxing
- HIPAA Compliant Faxing: Experts Weigh In On Why It Matters
- How to Send a Fax Without a Fax Machine
- Mobile Faxing: How Do I Fax From My Phone?
- The Millenial/Gen Z Guide to Faxing
- Faxing in a Hybrid or Remote Work Environment
- The Environmental Impact of Online Faxing
- FAXAGE Adds SSL Fax Capability
- FAXAGE Earns HITRUST Certification
- How Different Industries Use Online Fax
- FAXAGE App Released
- COVID-19 & Cloud Faxing
- FAXAGE Reviewed by FitSmallBusiness
- FAXAGE Adds SSO
- Faxploit Information
- Security Auditing Added
- Ottawa fax numbers added
- Vancouver fax numbers added
- London fax numbers added
- Hamilton fax numbers added
- Toronto fax numbers added
- Alaska fax numbers added
- Enhanced fax spam blocking features
- Toll Free Fax Numbers in 844 Released
- Secure Email to Fax with Thunderbird
- Toll Free 844 Coming Soon
- Free Software - FAXAGE Staff Member Picks
- Scan to Fax Tips
Even in 2026, fax cover sheets are still a routine part of professional communication. Whether you’re sending contracts to a law firm, purchase orders to a supplier, or general correspondence to a business partner, a well-formatted cover sheet signals professionalism and ensures your fax gets to the right person quickly. Think of it as the front door of your fax; it tells the recipient who sent it, why it’s being sent, and how many pages to expect.
Let’s review what a fax cover sheet is, walk through how to fill one out (including what "Re" means on a fax cover sheet), and review a free, ready-to-use general template.
What Is a Fax Cover Sheet?
A fax cover sheet is the first page of a fax transmission. It’s placed in front of the main document and functions as a routing guide for the recipient, giving them critical context right away: who the fax is for, who sent it, how many pages are attached, and what it’s about.
Cover sheets have been standard in professional faxing for decades, and for good reason. When faxes arrive at a shared machine, a front desk, a mail room, or a multi-user fax line, the cover sheet is what routes the document to the right person or department. Without one, a fax can sit unnoticed, get misrouted, or cause unnecessary back-and-forth.
When Should You Use a Fax Cover Sheet?
While not always required, a cover sheet is a good idea any time you:
- Are faxing to an organization with a shared fax number
- Need to confirm the page count with the recipient
- Want a written record of when and to whom the fax was sent
- Are including a brief message or set of instructions alongside the main document
For regulated transmissions involving medical records, legal documents, or other sensitive content, cover sheets serve an additional protective purpose. If your faxes include Protected Health Information (PHI), consider a HIPAA-compliant fax cover sheet for a purpose-built template.
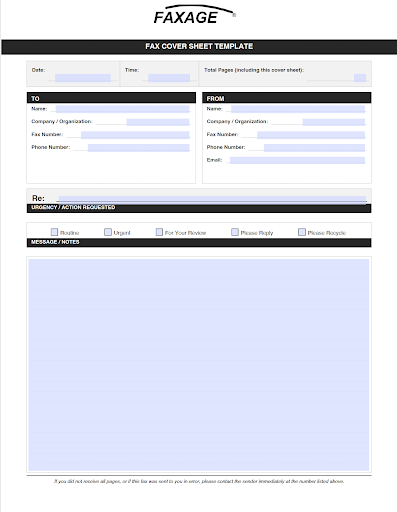
Free General Fax Cover Sheet Template
Click here to download a PDF example template
How to Fill Out a Fax Cover Sheet
Getting each field right on a cover sheet matters more than it might seem. Here’s a quick breakdown of what to enter in each section.
Field-by-Field Breakdown
Date and Time: Record the date and time of sending. This creates a simple paper trail useful for business records, billing, and dispute resolution.
Total Pages: Count every page in the fax, cover sheet included. If you’re sending a two-page contract, the total is three. This lets the recipient immediately confirm whether any pages are missing.
To (Recipient Information): Include the recipient’s full name, company, fax number, and a direct phone number when available. The more specific you are, the easier the fax is to route, especially in larger organizations with shared numbers.
From (Sender Information): Include your full name, company, fax number, and a callback phone number. Adding your email address gives the recipient a second way to confirm receipt or follow up.
Re: This is the subject line of your fax. See the dedicated section below for what this field means and how to use it effectively.
Urgency / Action Requested: Check the box that best describes what you need from the recipient. This sets clear expectations without requiring a lengthy written explanation.
Message / Notes: Use this area for a brief note, context, or instructions. Keep it short. The detailed information belongs in the attached document, not on the cover sheet.
What Does "Re" Mean on a Fax Cover Sheet?
The "Re:" field stands for "regarding." It identifies the subject or purpose of the fax in a single line. You’ve likely seen it used the same way in email subject lines and legal correspondence: it’s a concise reference point that tells the reader what the document is about before they get to it.
On a fax cover sheet, the "Re:" field functions exactly like an email subject line. A few examples of how to use it:
- Re: Invoice #4821 - Payment Due April 30
- Re: Signed Contract - Q2 Services Agreement
- Re: Purchase Order #2213 - Revised Terms
- Re: Authorization Request Enclosed
Keep the "Re:" line brief and specific. The goal is to give whoever pulls the fax from the machine just enough context to know who needs it and why it matters, without writing a paragraph.
How to Auto-Generate a Cover Sheet with FAXAGE
Templates work well, but managing them manually across a team creates inconsistency over time, outdated logos, missing fields, or forgotten confidentiality language. FAXAGE supports automatic cover sheet generation, so your team sends a complete, consistent cover page every time without any extra steps.
Email-to-Fax: Enabling Automatic Cover Pages
FAXAGE’s email fax service doesn’t attach a cover page by default, but you can configure it to generate one automatically for every fax sent via email. Once enabled, key sender fields, name, company, and fax number are pre-populated from your account settings. Review full setup instructions on page 13 of the FAXAGE Email Fax Sending Guide.
Web Portal and Admin: Configuring Cover Sheet Settings
For teams using the FAXAGE web interface, cover sheet settings are managed through the admin tools. You can enable the cover sheet feature, upload a company logo (which appears at the top of each generated cover sheet), and configure default sender fields so every outbound fax presents a consistent, professional face. This walkthrough is on page 29 of the FAXAGE User’s Guide.
Auto-generated cover sheets are especially valuable for high-volume workflows, referrals, purchase orders, and authorization forms, where manually attaching cover sheets would slow things down and introduce errors.
Frequently Asked Questions
Is a fax cover sheet required?
No. A cover sheet isn’t legally required in most situations. That said, it’s widely considered best practice, especially when sending to organizations with shared fax lines, or any time you want a clear record of who sent what and when.
Can I use this template for HIPAA-regulated faxes?
This template is designed for general business use. If you’re transmitting Protected Health Information (PHI) or other regulated content, you’ll want a HIPAA-oriented cover sheet that includes a confidentiality notice and minimum-necessary language. The auto-generated FAXAGE cover sheets also allow for a standard disclaimer/notice to be put on every auto-generated cover sheet.
Does FAXAGE support cover sheets on high-volume fax plans?
Yes. Cover sheet configuration is available across all FAXAGE plans. Whether you’re on an individual plan or a high-volume business plan, you can set up automatic cover page generation through the admin tools.
A Simple Cover Sheet Goes a Long Way
A fax cover sheet doesn’t have to be complicated; it just needs to be complete. Getting the basics right - recipient info, sender info, page count, subject, and urgency - ensures your fax reaches the right person without confusion and leaves a clear paper trail.
Compare plans and explore FAXAGE’s online fax service to find the right fit for your team.
FAXAGE® is a registered trademark of EC Data Systems, Inc.
© Copyright 2004-2026 EC Data Systems, Inc. all rights reserved